
Featured


HOME DESIGN & DIY
Here is an update on how the nursery came together, with all the linkable sources in one place!
We are into Week 3 of the One Room Challenge where we are turning our guest room into a nursery for our baby girl due in January!
Before we started this Nursery adventure, I had already planned on this week being a bit of an easy one, because we snuck in a little babymoon in Los Angeles! We relaxed, saw some sites, and ate very well! Now, back to the Nursery ORC! Knowing that we were going to be out of town this week, we planned to spend this week placing orders. This way, we could be sure that nothing arrived while we were out of town!
Week 2 of the One Room Challenge is upon us and I’ve been getting. stuff. done. (Or at least as much as my 6-month-pregnant body will allow!
My mind has been on overdrive recently, and as a result, I’ve been revising my original nursery design plan and truly diving into exactly how I envision each piece functioning. First, let’s talk about this pivot in design…
This fall I am transforming one of our guest rooms into a nursery, as Baby Girl is due in January! The overall mood I’m going for in here is elevated neutral with pops of soft color. I’m not looking for an overly baby-themed room…let’s be honest, the baby won’t care what this room looks like! But if I’m going to possibly be spending late nights rocking her to sleep in there, I want it to be pleasing to me and my overall aesthetic! As she gets older and develops her own little personality, I’m sure this room will transform along with her evolving tastes, so I’ll be making design changes with that in mind.
We have done a lot of updates to our Great Room since moving a couple of years ago. And with a lot of time at home recently, I’ve really geared up on the home projects! Today I wanted to show you how I updated our inherited dining room set with chalk paint, taking it from the 1970s to the 2020s!
Today’s tale is about new art for less than $12. And the lessons I learned while taking three shots at it (not by choice!)
Here’s what this piece of art started as — it was a generic canvas that I purchased from Bed, Bath, and Beyond probably ten years ago. It lived a good life as it was, but I had outgrown it and it didn’t quite fit my style anymore. It had been collecting dust in a closet, so I decided to give it a second life, as the featured piece of our entryway as part of my One Room Challenge.
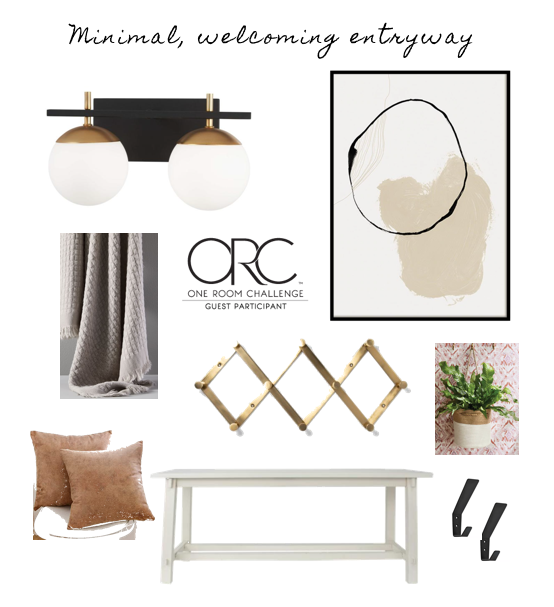
My One Room Challenge is starting to really take shape! This week all the packages started arriving and design decisions are in full swing for my new entryway. Almost every order is a hit…almost. Read on to see the thought process and final decisions on what may and may not work (so far)! I can’t wait for this space to continue taking shape!
This week I began ordering some items for the entryway, but until they all arrive, I figured this would be a good time to walk through the entryway and how it flows with the rest of the room — a lay of the land, if you will! I’ll walk you through a couple of the design constraints I’m working around, and I’ll also show you a side DIY project that I finally finished…it’s not exactly part of the entryway, but it’s sort of related…read on to see what I mean!
Here I am, ready for my first One Room Challenge!
For those who aren’t aware, the One Room Challenge (ORC) is a way for creators to share the process of transforming one room, and finishing said room within six weeks. It’s all about the process. And finishing. And the community. And did I mention finishing a single project in just six weeks!?
For me, this is key — when it comes to my home decor projects: I love to take my sweet, sweet time. I obsess over the details, and sometimes overdo the research, only to hurry through parts here and there…and before I know it, weeks and weeks have passed, and my dear husband begins to sweetly wonder aloud what I’ve been up to. (He really is the sweetest for putting up with all my projects, by the way!)
Hey there! Some of our links here are the site are affiliate links. This means we may earn a small commission on purchases made through the links, at no extra cost to you. This helps support our family and the content we create. Rest assured, we only recommend products or services we believe in. Cheers!
I recently made some custom book ledges for my daughter’s room and both she and I couldn’t be more thrilled! Best of all? They couldn’t have been any easier. Read on to see what a couple of craft boards and some wood glue can get you!